Automation Using Selenium Webdriver

Friday 7 October 2016

How to capture screenshot for failed test cases in Selenium Webdriver

How to capture screenshot for failed test cases in Selenium Webdriver

Writing Selenium Webdriver script is not enough everyone can design script nowadays. We need to design script in such a way that we can utilize script code as much as possible.This article will talk about Capture screenshot in selenium for failed test cases.
I am a big fan of screenshots in Automation because it helps me a lot to identify the exact issue.

Generally, scripts fail in 2 situations.

1-If script has some issue (some locator has been changed or application has some changes)- In this case, we need to maintain our Selenium script.
2-Due to application issue- In this case, we need to inform to respective point of contact (Manual Tester or Developer)

How to Capture screenshot in selenium for failed test cases

Previously I have covered a post on capture screenshot in Selenium so if you have not gone through the previos post then I will highly recommend you to please go through the post and youtube as well.

Today we will see something different How to capture a screenshot for failed test cases in Selenium Webdriver.
Here I will be using two new topics which will help us to achieve the same.
1-We will use ITestResult Interface which will provide us the test case execution status and test case name.
Please refer official doc for ITestResult
2- @AfterMethod is another annotation of TestNG which will execute after every test execution whether test case pass or fail @AfterMethod will always execute.
Please refer official doc for @AfterMethod
If you are new to TestNG and want to explore more on TestNG then I will recommend you to please go through below TestNG topics.
I have covered a couple of topics for TestNG. You can check all TestNG Tutorial here
Now let’s get started and will see through a complete program
// Create a package in eclipse
package captureScreenshot;

// Import all classes and interface
import java.io.File;
import library.Utility;
import org.apache.commons.io.FileUtils;
import org.openqa.selenium.By;
import org.openqa.selenium.OutputType;
import org.openqa.selenium.TakesScreenshot;
import org.openqa.selenium.WebDriver;
import org.openqa.selenium.firefox.FirefoxDriver;
import org.testng.ITestResult;
import org.testng.annotations.AfterMethod;
import org.testng.annotations.Test;
public class FacebookScreenshot {
// Create Webdriver reference
WebDriver driver;
@Test
public void captureScreenshot() throws Exception
{
// Initiate Firefox browser
driver=new FirefoxDriver();
// Maximize the browser
driver.manage().window().maximize();
// Pass application url
driver.get("http://www.facebook.com");
// Here we are forcefully passing wrong id so that it will fail our testcase
driver.findElement(By.xpath(".//*[@id='emailasdasdas']")).sendKeys("jaganthota");
}
// It will execute after every test execution 
@AfterMethod
public void tearDown(ITestResult result)
{
// Here will compare if test is failing then only it will enter into if condition
if(ITestResult.FAILURE==result.getStatus())
{
try 
{
// Create refernce of TakesScreenshot
TakesScreenshot ts=(TakesScreenshot)driver;
// Call method to capture screenshot
File source=ts.getScreenshotAs(OutputType.FILE);
// Copy files to specific location here it will save all screenshot in our project home directory and
// result.getName() will return name of test case so that screenshot name will be same
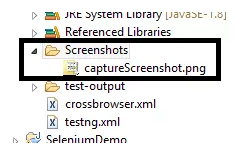
FileUtils.copyFile(source, new File("./Screenshots/"+result.getName()+".png"));
System.out.println("Screenshot taken");
catch (Exception e)
{ 
System.out.println("Exception while taking screenshot "+e.getMessage());
}
// close application
driver.quit();
}
}
Above code will execute fine and if test case will fail it will capture the screenshot. Check below screenshot
                                       

Above code is fine but still we need to enhance our code so that we can reuse.

We will create Utility class which will have one method which will capture the screenshot.
Code to create method for screenshot
package library;
import java.io.File;import org.apache.commons.io.FileUtils;
import org.openqa.selenium.OutputType;
import org.openqa.selenium.TakesScreenshot;
import org.openqa.selenium.WebDriver;
public class Utility 
{
public static void captureScreenshot(WebDriver driver,String screenshotName)
{
try 
{
TakesScreenshot ts=(TakesScreenshot)driver;
File source=ts.getScreenshotAs(OutputType.FILE);
FileUtils.copyFile(source, new File("./Screenshots/"+screenshotName+".png"));
System.out.println("Screenshot taken");
catch (Exception e)
{
System.out.println("Exception while taking screenshot "+e.getMessage());
}
}


Thursday 6 October 2016

How to Create Object Repository in Selenium Webdriver- Selenium

Whenever you talk about repository by the name itself you can think thatit is kind of storage. Object repository is the collection of object and object here is locator.Object Repository in Selenium Webdriver is quite easy todesign so let’s get started.

Here locator means web element id, name, CSS, XPath, class name etc.

Object Repository in Selenium Webdriver

To understand an importance of Object repository, we will take real time scenario.

The scenario is you have 100 test cases and in all test cases, you have login scenario. If your application changes now and some locator changes like id changes from email to login email then you have to modify all the test cases and you have to change the id.

This process does not make any sense so to overcome with this we will move all locator in a separate file and we will link all test cases to this file.
In case any changes happen in our locator we will simply change in that file, not our test cases.

This will increase the modularity of test cases and I will strongly suggest thatyou should use Object Repository in Automation.

Object Repository in Selenium Webdriver- Selenium Tutorial Precondition

1- Project should be created and Selenium jars should be added- Click here to configure .

2- Now create a new file and give file name as Object_Repo (depends on you)with extension .
properties

For this right click on project > create a new file > Specify name


Select folder and specify name & extension


3- Now file is created > Double click on file > File will open in Edit mode
Object repository works on KEY and Value pair so we will specify Keys based on our project and in values we will give locator value.
In below example, I have taken xpath for username,password and loginbutton for facebook loginpage.
Key you can write based on your project standard, but value should be correct which is coming from application
<span style="font-size: 14pt; font-family: arial, helvetica, sans-serif;">
facebook.login.username.xpath=.//*[@id='email']
facebook.login.password.xpath=.//*[@id='pass']
facebook.login.Signup.xpath=.//*[@id='loginbutton']</span>


4- Write Selenium script and use the same in script

Object Repository in Selenium Webdriver- Selenium Tutorial

package ObjectRepoExample;
<span style="font-size: 14pt; font-family: arial, helvetica, sans-serif;">import java.io.File;
import java.io.FileInputStream;
import java.io.FileNotFoundException;
import java.io.IOException;
import java.util.Properties;
import org.openqa.selenium.By;
import org.openqa.selenium.WebDriver;
import org.openqa.selenium.firefox.FirefoxDriver;
import org.testng.annotations.Test;
public class TestFacebook {
@Test
public void TestOR() throws IOException{
// Specify the file location I used . operation here because
//we have object repository inside project directory only
File src=new File(".Object_Repo.properties");
// Create  FileInputStream object
FileInputStream fis=new FileInputStream(src);
// Create Properties class object to read properties file
Properties pro=new Properties();
// Load file so we can use into our script
pro.load(fis);
System.out.println("Property class loaded");
// Open FirefoxBrowser
WebDriver driver=new FirefoxDriver();
// Maximize window
driver.manage().window().maximize();
// Pass application
driver.get("http://www.facebook.com");
// Enter username here I used keys which is specified in Object repository.
// Here getProperty is method which
// will accept key and will return value for the same
driver.findElement(By.xpath(pro.getProperty("facebook.login.username.xpath"))).
sendKeys("Selenium@gmail.com");
// Enter password here I used keys which is specified in Object repository.
// Here getProperty is method which
// will accept key and will return value for the same
driver.findElement(By.xpath(pro.getProperty("facebook.login.password.xpath"))).
sendKeys("adsadasdas");
 / Click on login button here I used keys which is specified in Object repository.
// Here getProperty is method which
// will accept key and will return value for the same
driver.findElement(By.xpath(pro.getProperty("facebook.login.Signup.xpath"))).click(); 
}}
</span>

How to disable Selenium Testcases using TestNG Feature

How to disable Selenium Testcases using TestNG Feature


Welcome to Selenium Tutorial, Today we are going to discuss very silent feature of TestNG which allow us to enable or disable our test case based on our requirement.

Why to Disable Selenium Test cases?

Before moving forward you should have Eclipse TestNG setup ready if still not configured then please doSelenium Eclipse setup now.
Once our test suite size will increase day by day then chances are high that you don’t want to execute some test cases.
Ok so let’s consider a scenario that you have written 10 testcases but now you want to execute only 5 testcase because other 5 are working correctly

How to Disable Selenium Test cases?

In TestNG we can achieve this by simply adding enable attribute and can set value to true/false.
If test case enable as false them while running test cases TestRunner simply will ignore this testcase and will only run testcase whose enable is set to true.
Note- By default @Test is set to enable
Scenario – I have 3 test case but I want to execute only 2 test case.
Precondition- TestNG should be installed

Program for – Disable Selenium Test cases

import org.testng.annotations.Test;
public class TestEnableTC {
@Test
public void testLoginApp(){
System.out.println("User is able to login successfully");
}
@Test(enabled=false)
public void testRegisteruser(){
System.out.println("User is able to register successfully");
}
@Test
public void testLogoutApp(){
System.out.println("User is able to logout successfully");
}
}